Add a Subscription
Subscriptions can be added from various places within the Siterra application. When adding a subscription, you can subscribe at the individual object level (a specific Site) or at the unit level (a specific region, such as West).
Add Subscriptions from My Preferences
-
Click My Siterra > Subscriptions.
The Notifications Subscription window appears.
You can also create Subscriptions by clicking the Subscribe icon in the upper right corner of Object pages, or by selecting My Siterra > Preferences.
-
Click Add.
The Subscriptions modal appears.
-
Complete the Notifications section of the form. Click Next and Previous to navigate.
Required fields are marked with a red asterisk (*).
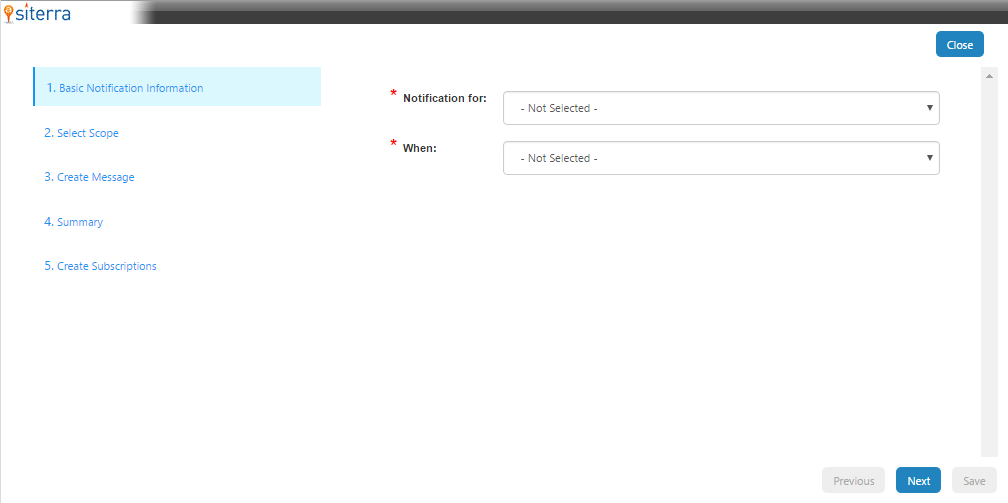
Step 1 of 5: Basic Notification Information

-
Notification For: Allows you to choose the desired object for which the notification is generated.
-
When: Allows you to choose from a list of various events and actions for which the notification is generated.
Based on your selection of the Notification For and When drop-down menus, additional fields appear, as they did before the 3.0.9 release.
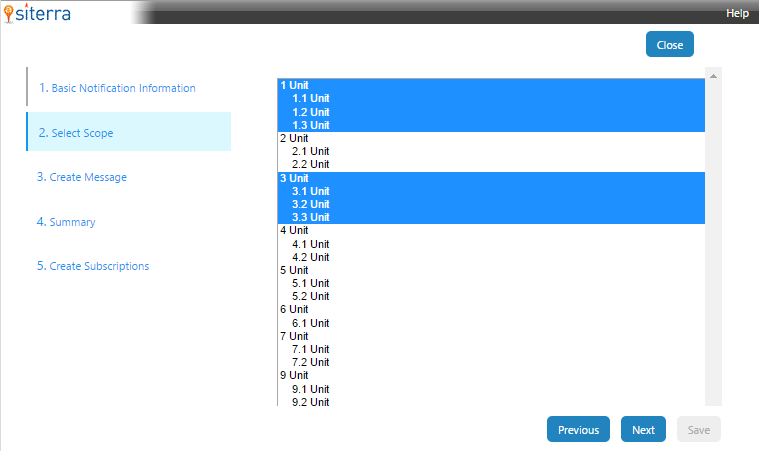
Step 2 of 5: Select Scope

-
Scope: Select the appropriate units (you can select more than one) for the Notification.
Step 3 of 5: Create Message

-
Complete the Message section of the form by entering a subject in the Subject field and a message in the Body field.
Various standard and expanded attributes can be added to the message body using the drop-down menu and object browser on the right side of the Message section.
Step 4 of 5: Summary

-
Review your Notification here. To change any information, click Previous to navigate to the correct step, then click Save to save the changes.
Once complete, click Save.
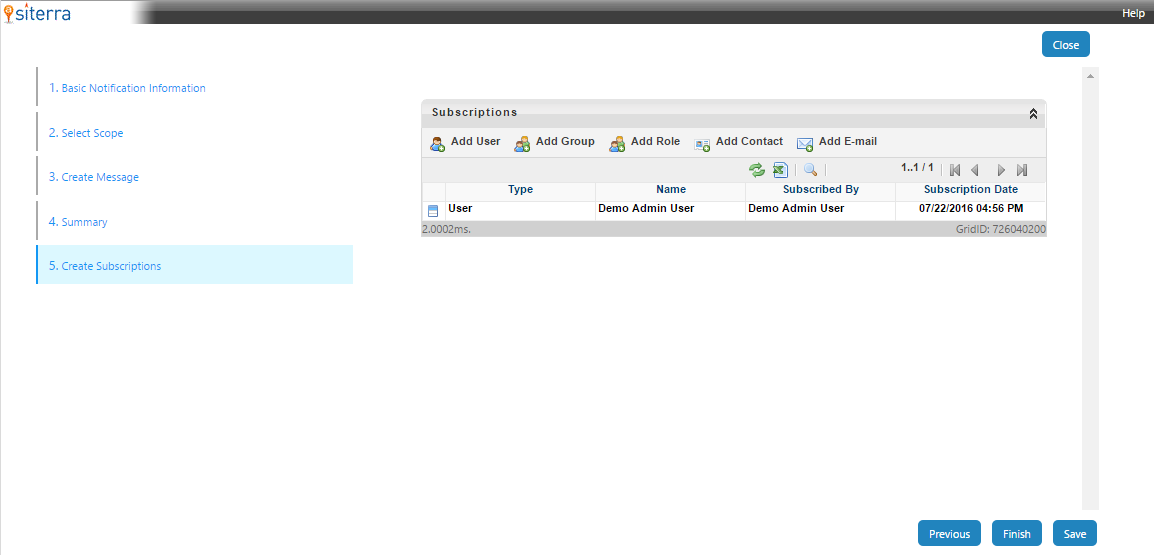
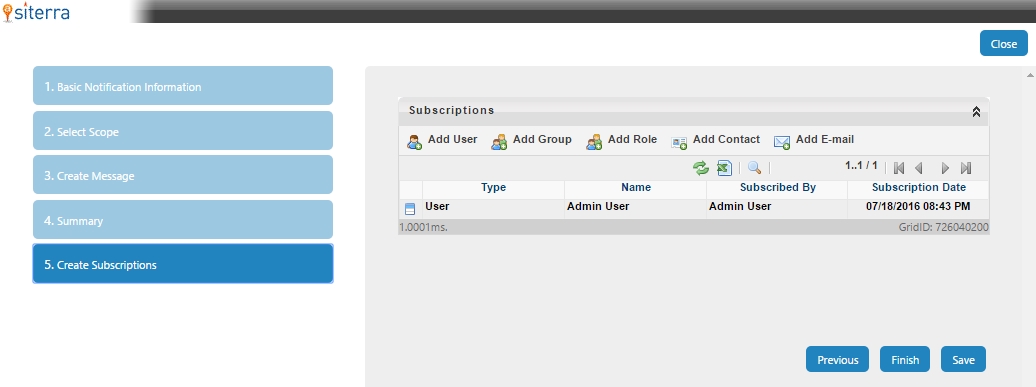
Step 5 of 5: Create Subscriptions
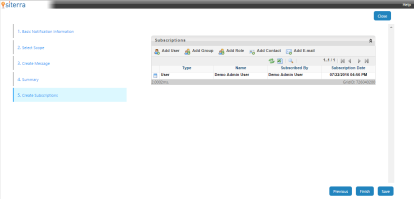
After the notification has been saved, recipients can be added to the subscription in the Create Subscriptions section.

-


Add Subscriptions from Object Home Pages
-
Navigate to an object home page.
-
In the toolbar, click Subscribe.
A new window appears containing a list of current subscriptions.
-
Click Add.
A new window appears containing a notification setup form.
-
Complete the Notifications section of the form.
Required fields are marked with a red asterisk (*). Fields in this section include:
-
Notification For: Read-only field which is automatically populated with the object name.
-
Select the event: Allows you to choose from a list of various events and actions for which the notification is generated.
-
Scope: Displays the navigation hierarchy. You can select an area for which the notification should be generated. Multiple areas can be selected by using Ctrl + Click.
-
Status: Allows you to select the object status for which the notification should be generated. Multiple statuses can be selected by using Ctrl + Click.
-
Where I have Responsibility: Selecting this check box designates that the notification should only be sent for objects where the user is assigned responsibility.
-
-
Complete the Message section of the form by entering a subject in the Subject field and a message in the Body field.
Various attributes can be added to the message body using the drop-down menu and object browser on the right side of the Message section.
Depending on certain settings, the Message section might be automatically populated with text.
-
Once complete, click Save.
After the notification has been created, recipients can be added in the Subscriptions section.
Add Recipients to Subscriptions
-
Navigate to the Subscriptions section of the notification subscriptions form.
-
Click one of the following toolbar buttons:
-
Add User: Opens a new window in which individual users can be selected as subscription recipients.
-
Add Group: Opens a new window in which a Group can be selected as a subscription recipient. All members of the selected Group receive the notification.
-
Add Role: Opens a new window in which a Role can be selected as a subscription recipient. All users in the selected Role receive the notification.
-
Add Contact: Opens a new window in which a Contact can be selected as a subscription recipient. You can also create a new contact from this window by clicking Create New.
-
Add E-mail: Expands the section to display a field in which multiple email addresses for subscription recipients can be added.
-
-
Using one of the above methods, enter recipients for the subscription.
Newly added recipients appear in the Subscriptions section.
To remove a recipient, click the menu stacks button next to the recipient and click Remove.
-
Once complete, click Save & Close.